# Getting Started with Villanova
You can set up Villanova in two simple steps or install it manually to meet your specific needs.
- Automatic Install: The fastest way to locally install and start up Villanova in Kubernetes.
- Manual Install: Useful if you want a shared cluster or a custom local instance.
Installation on Apple Silicon processors:
To install Villanova on Mac systems running ARM64 architecture, see this alternate Getting Started guide.
# Automatic Install
Automatically install Villanova via the Villanova command-line interface (CLI) and prepare a local developer environment with default settings. The following steps launch an Ubuntu VM via Multipass, install Kubernetes, and then deploy Villanova to it.
Install Multipass (opens new window).
Install Villanova into Kubernetes on Ubuntu using the Villanova CLI:
curl -sL "https://raw.githubusercontent.com/Villanova-AI/villanova-cli/refs/heads/develop/get-villanova.sh" | VILLANOVA_RELEASE="v0.9.0" bash
- The progress of the install is displayed on the console. Installation can take up to 10 minutes, depending on how long the Docker images take to download. The sequence of steps performed by the CLI is identical to the manual steps below. To better understand what the CLI does, review the manual steps.
- The URL to access the Villanova App Builder will print to the console once the install completes.
- Log in with username:
adminand password:adminadmin. Refer to Log in to Entando for more information and next steps.
# Manual Install
Manual installation allows you to configure a shared cluster or customize a local developer environment. The following learn-as-you-go approach provides additional context about the process in the highlighted text boxes. After downloading the necessary files, your instance of Kubernetes will be up and running in <60 seconds.
This is a three stage process:
What's Needed to Run Kubernetes?
Kubernetes is a container orchestrator designed to manage a server cluster. It requires at least one master node running a Linux OS. A lightweight Ubuntu virtual machine (VM) can be created in seconds with Multipass. Choosing a Type 1 hypervisor eliminates a guest OS, maximizing speed and performance.
# Install Kubernetes
# 1. Enable a Hypervisor
Why a hypervisor?
Hypervisors allow you to create and run VMs. Virtualization software that runs on top of your operating system as a guest is a Type 2 hypervisor, like VirtualBox or VMWare Workstation. Type 1 hypervisors run directly on your host machine.
Install a Type 1 hypervisor for optimal performance.
- Mac: Install
hyperkit:
brew install hyperkit
- Windows: Install Hyper-V (opens new window)
What if my machine doesn't support hyperkit or Hyper-V?
Install a Type 2 hypervisor that runs on top of your operating system.
- Install Virtual Box: Mac (opens new window) Windows (opens new window)
# 2. Launch an Ubuntu VM
Why Multipass?
Multipass is a cross-platform tool developed by the publishers of Ubuntu to create lightweight Ubuntu VMs in seconds.
Install Multipass (opens new window)
Launch a VM:
multipass launch --name quickstart --cpus 4 --mem 8G --disk 20G
- Open a VM shell (Note on Windows, you may need to use
winpty multipass):
multipass shell quickstart
# Run Kubernetes
Why K3s?
K3s is a certified light-weight version of Kubernetes designed for production workloads in constrained environments.
It's packaged as a single (<50MB) binary that minimizes dependencies and simplifies the procedures required to install, run, and update a production Kubernetes cluster.
- Install the version of
K3ssupported by Villanova 0.9. Note that this may not be the latest version of Kubernetes.
curl -sfL https://get.k3s.io | INSTALL_K3S_CHANNEL="v1.26.10+k3s2" sh -
- Check that the cluster
STATUSisReady.
sudo kubectl get node
What's running out of the box?
sudo kubectl get pods -A
Congratulations!
You now have a local instance of Kubernetes up and running.
Now that Kubernetes is running, you can use kubectl to send commands directly to K3s from the host machine, rather than from within the VM. To set this up with the ent CLI, run ent attach-vm quickstart and then use ent kubectl for any calls to Kubernetes. Alternatively, see the K3s documentation to access your cluster with kubectl (opens new window).
# Prepare Kubernetes
To install Villanova, add the Custom Resources, create a Namespace, and configure external access to your cluster.
# 1. Create a Namespace
sudo kubectl create namespace villanova
What are Namespaces?
Kubernetes supports multiple virtual clusters backed by the same physical cluster. These virtual clusters are called namespaces (opens new window). You can use namespaces to allocate resources and set CPU/memory limits for individual projects or teams.
# 2. Add Custom Resources
Why Custom Resources?
Standard resources in Kubernetes include Pods (groups of one or more containers), Services to call or access Pods, and Ingresses to enable external access to Services.
Custom resources (opens new window) let you store and retrieve structured data. Combining a custom resource with a custom controller allows you to define a desired state to automate how your applications and services run in a Kubernetes cluster.
Examples of custom resources in Villanova are the Villanova App Engine and the Villanova Identity Management System.
From your Ubuntu shell:
- Install the cluster-scoped custom resource definition (CRD):
sudo kubectl apply -f https://raw.githubusercontent.com/Villanova-AI/villanova-releases/v0.9.0/dist/ge-1-1-6/namespace-scoped-deployment/cluster-resources.yaml
- Install the namespace-scoped custom resource:
sudo kubectl apply -n villanova -f https://raw.githubusercontent.com/Villanova-AI/villanova-releases/v0.9.0/dist/ge-1-1-6/namespace-scoped-deployment/namespace-resources.yaml# 3. Configure Access to Your Cluster
What about Networking?
Villanova sets up Ingresses (opens new window) in Kubernetes to expose HTTP routes from outside the cluster to services within the cluster. This is used to access Villanova from a local browser.
If you run into network issues during startup, or if you are using Windows for your local development instance, you'll need to troubleshoot your network. Indications of network issues can include Villanova failing to completely start or a working Villanova instance failing to restart later.
To set up external access to your cluster, determine the fully qualified domain of your Ubuntu VM for the ingressHostName value in the VillanovaApp CRD.
On Windows with Hyper-V,
ingressHostNameis the name of your VM followed by.mshome.net, e.g.quickstart.mshome.net.On Mac, Linux, or Windows without Hyper-V,
ingressHostNameis your VM name, plus you VM's IP address, plus "nip.io". You can determine the IP address from within the VM with this command:
hostname -I | awk '{print $1}'
E.g.: For VM named quickstart, IP=192.168.64.33
ingressHostName = quickstart.192.168.64.33.nip.io
The suffix .nip.io makes use of the free nip.io (opens new window) DNS service so that any requests to this host name will resolve to your VM. quickstart is arbitrary so you can choose your own VM name.
Now that you've determined ingressHostName, use it to configure the Villanova Application.
- Download the template
entando-app.yaml.
curl -sLO "https://raw.githubusercontent.com/Villanova-AI/villanova-releases/v0.9.0/dist/ge-1-1-6/samples/entando-app.yaml"- Modify
entando-app.yamlwith theingressHostNamefound in the previous step. Examples:
- Windows machine:
ingressHostName: quickstart.mshome.net - Mac or Linux:
ingressHostName: quickstart.192.168.63.33.nip.io
Embedded Databases
To speed up the Getting Started environment, embedded databases are used by default.
See the Tutorial on Default Databases for information on how to change your database connection, or modify the dbms setting in the entando-app.yaml.
Villanova Operator
An optional ConfigMap can be used to modify the behavior of the Villanova Operator. For example, on a slower network, you may want to increase the download timeouts. Refer to the Villanova Operator page for more information.
VillanovaApp Ingress Path
To customize the ingress path of a deployment, refer to the Configure the Villanova App Context tutorial.
# Deploy Villanova
- Deploy Villanova by applying
entando-app.yamlto your namespace.
sudo kubectl apply -f entando-app.yaml -n villanova
- Use the
get pods --watchcommand to observe Villanova starting up.
sudo kubectl get pods -n villanova --watch
What does a successful startup look like?
- The
entando-operatorandentando-k8s-servicestart when you apply the namespace resources above, so they should already be inRunningstatus by the time you reach this point. - When you apply the
entando-app.yaml, thequickstart-deployerstarts and kicks off a series of deployments, beginning with the Keycloak deployment via thedefault-sso-in-namespace-deployer.
Jobs / Deployments
- Some Pods, like
quickstart-deployer, run to completion and then shutdown; they should eventually showREADY:0/1andSTATUS:Completed. - Other deployments, like
quickstart-ab-deploymentorquickstart-deployment, should eventually showREADY:1/1andSTATUS:Running
Lifecycle Events
- Each line represents an event:
Pending,ContainerCreating,RunningorCompleted. - Restarts should ideally be
0; otherwise, there may be a resource problem (slow network, not enough CPU or memory, etc.) with your cluster, and Kubernetes is trying to self-heal. - This is a partial history for a typical install.
NAME                                                  READY   STATUS              RESTARTS  AGE
entando-operator-5b5465788b-s6wjh                    1/1     Running             0          99m
entando-k8s-service-86f8954d56-lp5nl                 1/1     Running             0          99m
quickstart-deployer-7217                             0/1     ContainerCreating   0          7s
quickstart-deployer-7217                             1/1     Running             0          14s
default-sso-in-namespace-deployer-2045               0/1     Pending             0          0s
default-sso-in-namespace-deployer-2045               0/1     Pending             0          0s
default-sso-in-namespace-deployer-2045               0/1     ContainerCreating   0          0s
default-sso-in-namespace-deployer-2045               1/1     Running             0          4s
default-sso-in-namespace-deployment-7ddc5d44f-bsq7w  0/1     Pending             0          0s
default-sso-in-namespace-deployment-7ddc5d44f-bsq7w  0/1     Pending             0          5s
default-sso-in-namespace-deployment-7ddc5d44f-bsq7w  0/1     ContainerCreating   0          5s
default-sso-in-namespace-deployment-7ddc5d44f-bsq7w  0/1     Running             0          88s
default-sso-in-namespace-deployment-7ddc5d44f-bsq7w  0/1     Running             0          114s
default-sso-in-namespace-deployment-7ddc5d44f-bsq7w  1/1     Running             0          115s
default-sso-in-namespace-deployer-2045               0/1     Completed           0          2m6s
default-sso-in-namespace-deployer-2045               0/1     Terminating         0          2m6s
default-sso-in-namespace-deployer-2045               0/1     Terminating         0          2m6s
quickstart-ab-deployment-5b5c7c4f5c-w774v            0/1     Pending             0          0s
quickstart-ab-deployment-5b5c7c4f5c-w774v            0/1     Pending             0          0s
quickstart-ab-deployment-5b5c7c4f5c-w774v            0/1     ContainerCreating   0          0s
quickstart-deployment-667859b44d-nnk79               0/1     Pending             0          0s
quickstart-cm-deployment-69bb5f9fd8-ll8dk            0/1     Pending             0          0s
quickstart-deployment-667859b44d-nnk79               0/1     Pending             0          2s
quickstart-deployment-667859b44d-nnk79               0/1     ContainerCreating   0          2s
quickstart-cm-deployment-69bb5f9fd8-ll8dk            0/1     Pending             0          2s
quickstart-cm-deployment-69bb5f9fd8-ll8dk            0/1     ContainerCreating   0          3s
quickstart-cm-deployment-69bb5f9fd8-ll8dk            0/1     Running             0          88s
quickstart-ab-deployment-5b5c7c4f5c-w774v            0/1     Running             0          102s
quickstart-ab-deployment-5b5c7c4f5c-w774v            0/1     Running             0          2m
quickstart-cm-deployment-69bb5f9fd8-ll8dk            0/1     Running             0          2m3s
quickstart-ab-deployment-5b5c7c4f5c-w774v            1/1     Running             0          2m10s
quickstart-cm-deployment-69bb5f9fd8-ll8dk            1/1     Running             0          2m12s
quickstart-deployment-667859b44d-nnk79               0/1     Running             0          3m29s
quickstart-deployment-667859b44d-nnk79               0/1     Running             0          4m50s
quickstart-deployment-667859b44d-nnk79               1/1     Running             0          4m52s
quickstart-deployer-7217                             0/1     Completed           0          7m17s
quickstart-deployer-7217                             0/1     Terminating         0          7m17s
quickstart-deployer-7217                             0/1     Terminating         0          7m17s
pn-3c07adf0-fac54a9f-entando-app-builder-menu-bff-deployer-6999   0/1     Pending             0          0s
pn-3c07adf0-fac54a9f-entando-app-builder-menu-bff-deployer-6999   0/1     Pending             0          0s
pn-3c07adf0-fac54a9f-entando-app-builder-menu-bff-deployer-6999   0/1     ContainerCreating   0          0s
quickstart-pn-3c07adf0-fac54a9f-entando-app-builder-menu-b-link-deployer-2017   0/1     Pending             0          0s
quickstart-pn-3c07adf0-fac54a9f-entando-app-builder-menu-b-link-deployer-2017   0/1     Pending             0          0s
quickstart-pn-3c07adf0-fac54a9f-entando-app-builder-menu-b-link-deployer-2017   0/1     ContainerCreating   0          0s
pn-3c07adf0-fac54a9f-entando-app-builder-menu-bff-deployer-6999                 1/1     Running             0          12s
pn-3c07adf0-fac54a9f-entando-app-builder-menu-bff-deploymep6j87                 0/1     Pending             0          0s
quickstart-pn-3c07adf0-fac54a9f-entando-app-builder-menu-b-link-deployer-2017   1/1     Running             0          16s
pn-3c07adf0-fac54a9f-entando-app-builder-menu-bff-deploymep6j87                 0/1     Pending             0          5s
pn-3c07adf0-fac54a9f-entando-app-builder-menu-bff-deploymep6j87                 0/1     ContainerCreating   0          5s
pn-3c07adf0-fac54a9f-entando-app-builder-menu-bff-deploymep6j87                 0/1     Running             0          40s
pn-3c07adf0-fac54a9f-entando-app-builder-menu-bff-deploymep6j87                 0/1     Running             0          53s
pn-3c07adf0-fac54a9f-entando-app-builder-menu-bff-deploymep6j87                 1/1     Running             0          54s
pn-3c07adf0-fac54a9f-entando-app-builder-menu-bff-deployer-6999                 0/1     Completed           0          69s
quickstart-pn-3c07adf0-fac54a9f-entando-app-builder-menu-b-link-deployer-2017   0/1     Completed           0          70s
pn-3c07adf0-fac54a9f-entando-app-builder-menu-bff-deployer-6999                 0/1     Completed           0          71s
pn-3c07adf0-fac54a9f-entando-app-builder-menu-bff-deployer-6999                 0/1     Terminating         0          71s
pn-3c07adf0-fac54a9f-entando-app-builder-menu-bff-deployer-6999                 0/1     Terminating         0          71s
quickstart-pn-3c07adf0-fac54a9f-entando-app-builder-menu-b-link-deployer-2017   0/1     Completed           0          72s
quickstart-pn-3c07adf0-fac54a9f-entando-app-builder-menu-b-link-deployer-2017   0/1     Terminating         0          72s
quickstart-pn-3c07adf0-fac54a9f-entando-app-builder-menu-b-link-deployer-2017   0/1     Terminating         0          72s
Press Ctrl-C to exit the watch command once everything is up and running.
What Pods come out of the box?
sudo kubectl get pods -n entando
NAME                                                  READY   STATUS    RESTARTS   AGE
entando-operator-cf499c46c-r2bhn                                  1/1     Running   0          13m
entando-k8s-service-6c94495c87-j9p7b                              1/1     Running   0          13m
default-sso-in-namespace-deployment-59d6cd795b-pgvth              1/1     Running   0          9m43s
quickstart-ab-deployment-7cd5c9987b-v96sv                         1/1     Running   0          7m4s
quickstart-cm-deployment-5896d4f8c5-sl8pg                         1/1     Running   0          7m
quickstart-deployment-57864cdfdf-n699w                            1/1     Running   0          7m1s
pn-3c07adf0-fac54a9f-entando-app-builder-menu-bff-deploymep6j87   1/1     Running   0          104s
The URL of your running Villanova instance is http://ingressHostName/app-builder/.
- Example URL:
quickstart.192.168.64.33.nip.io/app-builder/
# Log in to Villanova
Now that you've installed Villanova, log in to the Villanova App Builder.
- Username:
admin - Password:
adminadmin
After login, change your password to activate your account.
- Note: If the login process hangs for more than 5 seconds, refresh the browser.
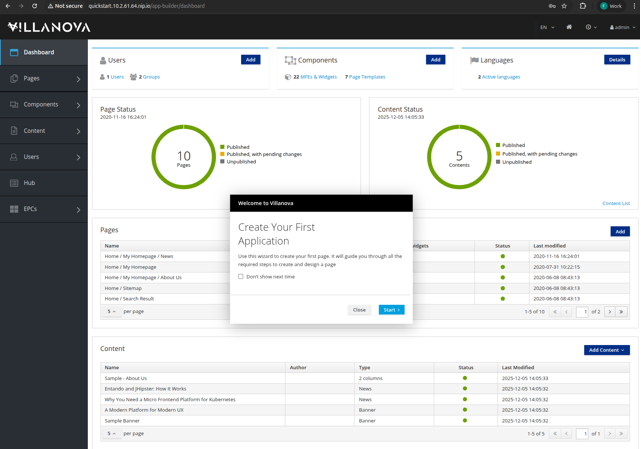
In the App Builder, applications are composed from various components, including micro frontends and CMS content.
Congratulations!
You now have Villanova up and running on Kubernetes in your local environment.
# Next Steps
Check out these resources to continue your journey with Villanova!
Try a Tutorial: Take advantage of the Learning Paths, which organize a few of the most popular tutorials by user type.
Dig Deeper into Villanova Concepts: Review the Docs sections to get a better understanding of the Villanova building blocks.
Learn about the Quickstart Environment: See the Quickstart Tips for more information on how to manage and troublshoot your quickstart environment.