# Villanova Hub Installation and User Guide
An Villanova Hub enables teams to share components across their organization to build composable applications with ease and speed. This catalog management software bundle can be installed in any Villanova 7+ instance and includes API-level integration with the App Builder.
The Villanova Platform comes built in with a local Hub for independent development, but additional registries can be connected, including an enterprise Hub where you can share and collaborate on modular components, through a private or public catalog. This tutorial describes the steps to install and access the enterprise version of the Villanova Hub.
For details on Hub features, definitions, and other details, see the Villanova Hub information page.
# Installation
An enterprise Villanova Hub is installed with two Villanova Bundles. One bundle contains the micro frontends and microservices, and should be installed first, while the second sets up the UI content and pages.
# Prerequisites
- An Villanova Application on any Kubernetes provider. Follow the tutorial appropriate for your environment to install the Platform.
- The ent command line tool, installed and connected to your Kubernetes instance.
# Install the Hub from the Villanova Cloud Hub
Connect the Villanova Cloud Hub to your Local Hub so you can access the Hub bundles directly from your App Builder:
- Log in to your App Builder
- Go to
Hubfrom the sidebar and clickSelect Registry - Choose
New Registry - In the pop-up window, enter the following:
Name: Villanova Cloud Hub
URL: https://auth.entando.com/entando-hub-api/appbuilder/api
The API Key is required only for private enterprise Hubs. Click `Save.
- Select the Cloud Hub in the Registry drop-down and find the Villanova Hub bundles
- Deploy and install
entando-hub-applicationbundle by clicking it and following the instructions in the pop-up window. Note that you can choose the version by clicking the down arrow in the install button. Theapplicationbundle must be installed first because it sets up the necessary frontend components for theentando-hub-contentbundle. - Repeat the steps for
entando-hub-content. They should now appear in your Local Hub. Continue with the Configuration steps below.
# Manual Installation Steps
- Apply the custom resource definitions in this order to deploy the Hub bundles:
ent bundle generate-cr -t prod --image=docker://registry.hub.docker.com/entando/entando-hub-application | kubectl apply -f -
ent bundle generate-cr -t prod --image=docker://registry.hub.docker.com/entando/entando-hub-content | kubectl apply -f -
Log into your App Builder instance.
Select
Hubfrom the left menu. The Hub bundles are listed as Deployed in the local Hub catalog:
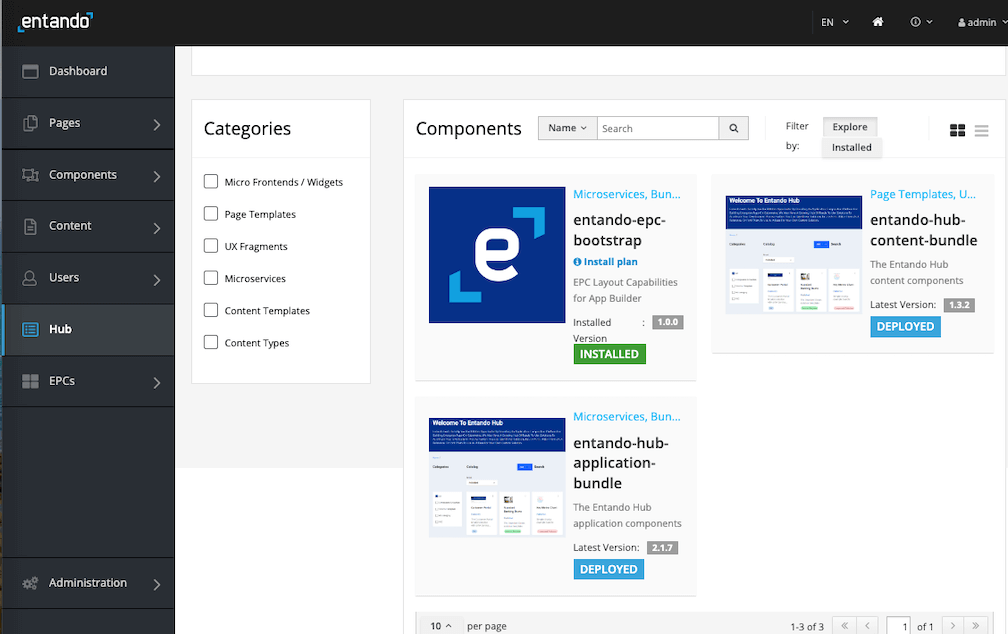
- Click each bundle icon and
Installthe bundle, starting with theentando-hub-application. Again the order of installation is crucial. It may take several minutes to download the Docker images for the microservices and install the related assets.
For multi-bundle components or PBCs, you need to follow the same order of installation for upgrades. For uninstalling the group bundles, follow the reverse order of installation.
# Configuration
Set up permissions to configure the service for the Hub administrator:
- Log in to your Keycloak instance as an admin.
- Give at least one user the ability to manage the Hub by adding the
eh-adminrole. Assign theeh-adminrole for thepn-152edaba-0a2ba8fb-entando-entando-hub-catalog-ms-serverclient. See Role Assignment in ID Management for more details. - Give the generated plugin client permission to manage users.
- From the left sidebar, go to
Clientsand select client IDpn-152edaba-0a2ba8fb-entando-entando-hub-catalog-ms-server. - Click the
Service Account Rolestab at the top of the page and selectrealm-managementfrom theClient Rolesfield. - Choose
realm-adminfromAvailable Rolesand clickAdd selected. It should now appear as anAssigned Role.
- From the left sidebar, go to
To access your enterprise Hub:
- Navigate to
Pages→Managementin the App Builder - Find
Villanova Hubin the page tree, and clickView Published Pagefrom itsActionsdrop-down options
- Navigate to
# Using the Enterprise Hub
# The Hub UI
The enterprise Villanova Hub provides a UI where users, entries, and catalogs are managed. Private and public catalogs are also configured there.
- Administrators create and manage users, categories, and organizations.
- Authors and managers create and manage the components organized there called Bundle Groups. They are assigned varying levels of access to perform their tasks.
- Public or private catalogs can be configured, both directly accessible from the App Builder.
# Create Users
Only a Hub administrator has the authorization to create and manage users.
- Log in to your Keycloak admin console.
- To create a new user, go to
Usersfrom the left sidebar and clickAdd User. Enter the relevant identity information.Save - Go to the
Role Mappingtab and assign these roles forClient Rolespn-152edaba-0a2ba8fb-entando-entando-hub-catalog-ms-server:- for an author, assign
eh-author - for a manager, assign
eh-manager
See role definitions
- for an author, assign
- Log in to the Hub UI as an admin
- Go to
User Managementand clickAdd User - Choose the desired user and select an organization from the drop-down list. If the organization is not available, go to Organization Management to add it. Note: the administrator needs to belong to the same organization(s) as well, especially for private catalogs that require an API key.
# Create New Entries/Bundle Groups
At the top of the Hub UI, click the Add + button to create a new Bundle Group. This is what a component entry is called on Villanova. In the pop-up window, enter the details for the entry.
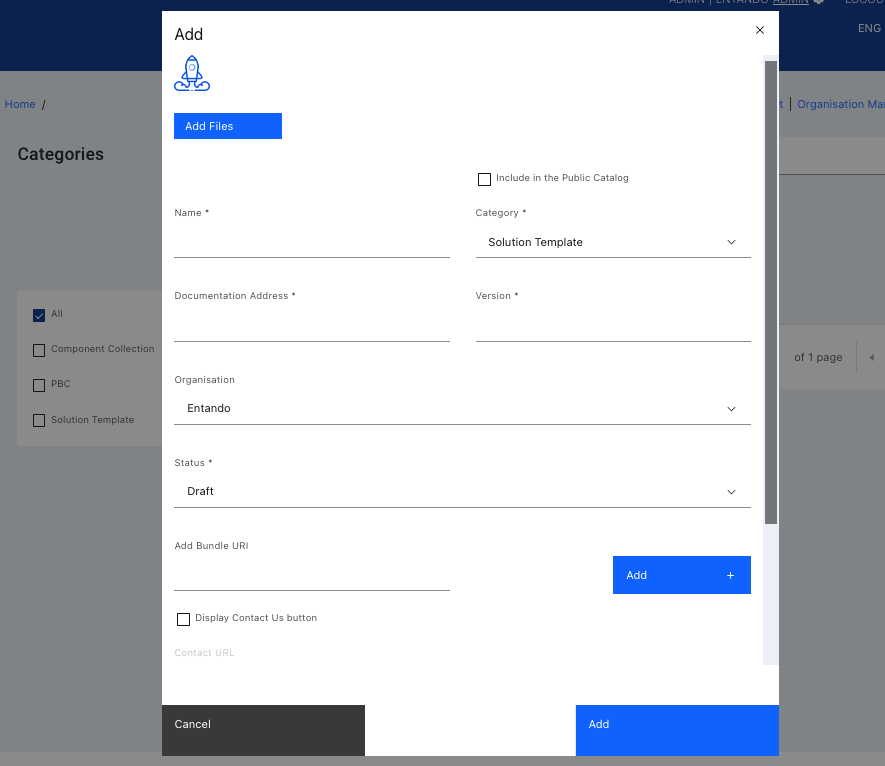
- Upload a thumbnail to represent the Bundle Group.
- Enter the documentation address, version and organization name (e.g., a team or business unit) as required.
- Add one or more bundle URI(s) using the
Add +button beside the field. For multi-bundle entries, it is recommended that the URIs be entered in the order they should be installed so they will be listed in that order in the Hub.
Should a multi-bundle entry need to be uninstalled, bundles will need to be removed in the reverse order so dependencies can be cleared without issue.
- Check the
Display Contact Us buttonand enter theContact URLto gather more information from the visitor and manage access to the Bundle Group. Typically the contact URL points to a request form on the owner's web site.
Find more information on Bundle Group publishing status and versioning rules.
# Create a Private Catalog
A private catalog can be configured when creating a new organization. There can be many organizations in a single Hub instance, but each organization is allowed one private catalog. Only the Hub admin can create an organization and provision a private catalog for it.
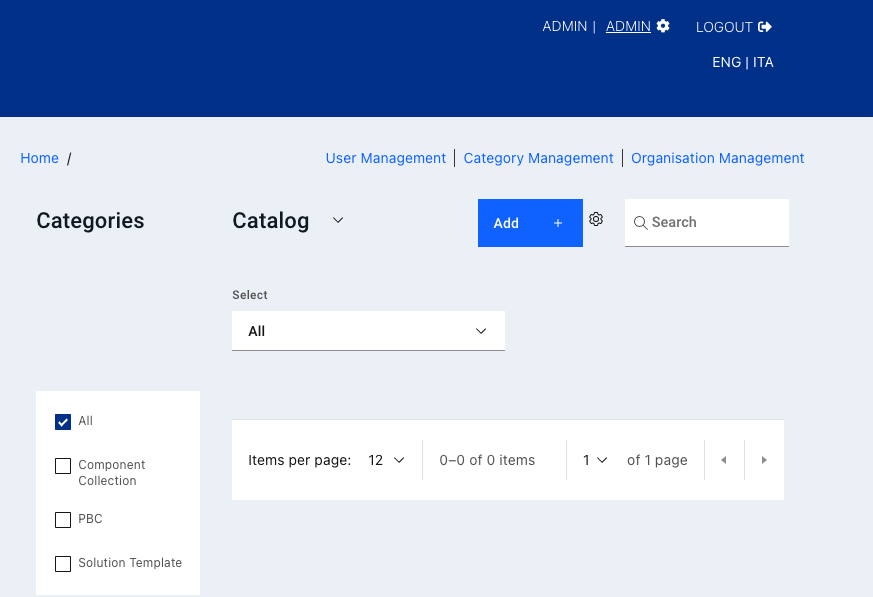
- Go to
Organization Managementfrom the top menu. - Click
Add Organization +, enter the required information in the pop-up window, and clickSave. - The new organization will appear in the current list. Click the kebab menu to the right and select
Create Private Catalog. A key icon appears next to the private catalog to confirm it. To go directly to this catalog, use the link in the same menu.
# Generate an API Key
API access to private catalogs requires the use of an API key instead of user credentials. When configuring access to the private registry from the App Builder, the API key is required.
- API Keys are attached to a specific user account so log in as a user assigned to the organization connected to the private catalog.
- From the Hub UI homepage, click on the gear icon at the top and select
API Key Management. - Click
Generate API Key, enter a name and confirm with the blue generate button. Save the key for future reference.
The API key is required to share the bundles and PBCs in a private Villanova Hub catalog. Bundles can be initialized directly from the catalog by using the ent bundle init command or by adding the registry in your App Builder and deploying it from that catalog as described below.
# Add a Catalog Registry
Any enterprise Hub instance can be accessed from the Villanova App Builder, with the right credentials.
- In the App Builder, go to the Hub from the left navigation bar and click
Select Registry - Choose
New Registryfrom the drop-down menu - Enter the Hub name and the API endpoint for the catalog:
The API endpoint is
https://YOUR-BASEURL/entando-hub-application-152edaba/entando-hub-catalog-ms/appbuilder/apiwhereYOUR-BASEURLis the hostname of your Villanova instance.Private Catalog
For a private Hub, the URL has an added catalog ID number from its HTTP address. Go to the published Hub page from the App Builder and find the address in the browser. The number after/catalog/isYOUR-CATALOG-ID#.- The URL to access the catalog is
https://YOUR-BASEURL/entando-hub-application-152edaba/entando-hub-catalog-ms/appbuilder/api/?catalogId=YOUR-CATALOG-ID#
E.g., If your catalog web address is
https://quickstart.k8s-entando.org/entando-de-app/en/entando_hub.page#/catalog/1/→1is YOUR-CATALOG-ID#The URL to enter:
https://quickstart.k8s-entando.org/entando-hub-application-152edaba/entando-hub-catalog-ms/appbuilder/api/?catalogId=1- The URL to access the catalog is
- If an API key is required, ask your Hub administrator or generate a key if you have a Hub user account.
# Resources
- Enterprise Villanova Hub Features and Definitions
- Source Code
Villanova open source examples and tutorials are available on GitHub. Reference the Hub sample project for instructions to build the project from source code:
https://github.com/Villanova-AI (opens new window)