# Villanova Standard Banking Demo
This tutorial guides you through installing a demonstration application using a set of Villanova Bundles and the Villanova Hub. The solution template includes:
- Microservices
- Micro frontends
- Multiple pages
- CMS content
This exercise showcases how Villanova Bundles can be used to:
- Quickly install and create functionality in an Villanova Application
- Enable packaged business capabilities (PBCs)
- Allow developers to reuse full-stack operations via bundles
Several key elements of this solution package are reviewed in the Application Details section below.
# Installation
The Standard Banking Demo installs bundles containing multiple assets. Villanova Bundles should contain the number and types of components necessary to satisfy business and developer objectives, making it easier to reuse.
# Prerequisites
- A running instance of Villanova. Install Villanova on any Kubernetes provider or see Getting Started for more information.
- The Villanova CLI, installed and connected to your Kubernetes cluster.
# Automatic Installation
Install the Standard Banking Demo by accessing the Villanova Cloud Hub from your App Builder:
Log in to your App Builder
Go to
Hub→Select RegistryChoose
Villanova Hubif it has been configured. If not:- Select
New Registry - In the pop-up window, enter:
Name: Villanova Cloud Hub
URL: https://auth.entando.com/entando-hub-api/appbuilder/api - Click
Save - In
Select Registry, chooseVillanova Cloud Hub
- Select
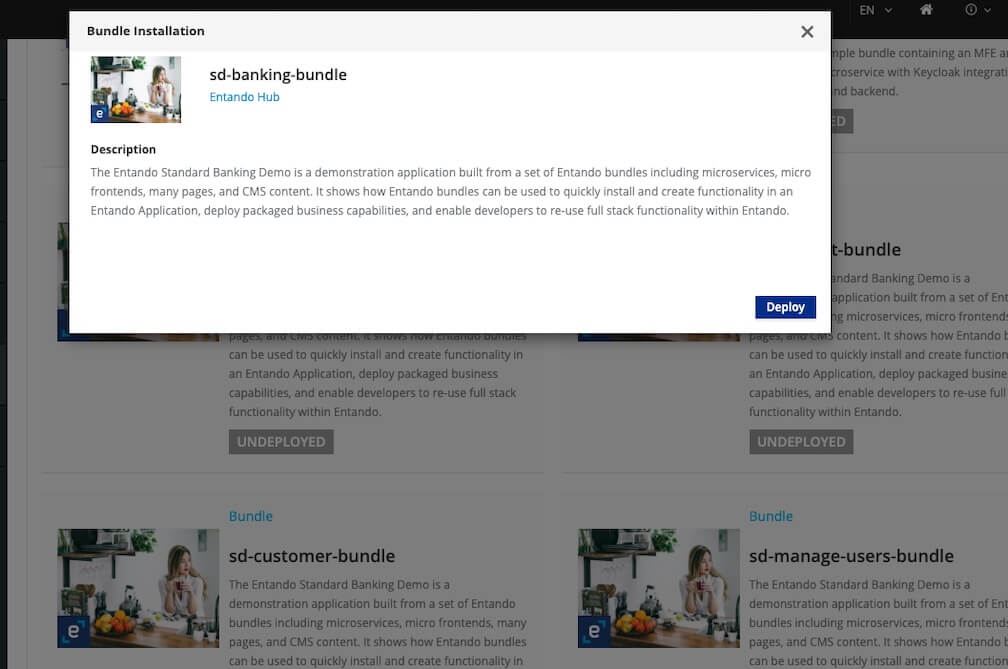
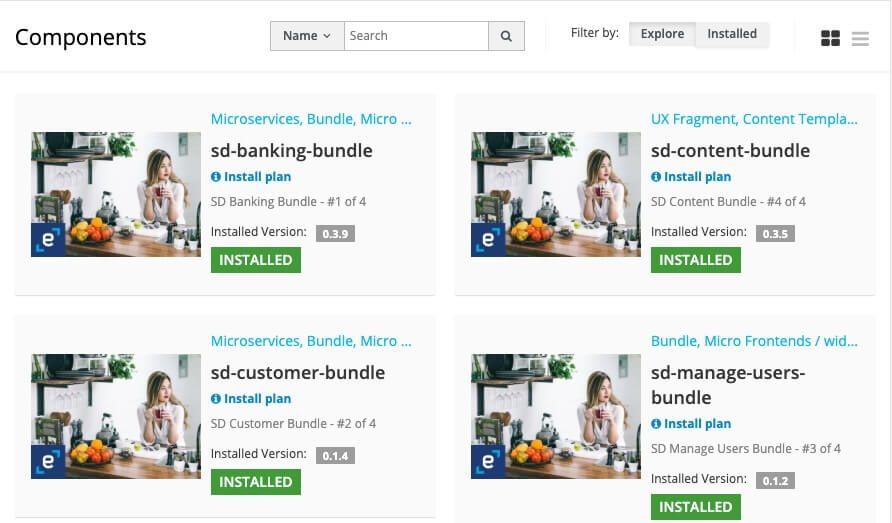
From the catalog, deploy and install each of the four Standard Banking Demo Bundles in this order:
sd-banking-bundle
sd-customer-bundle
sd-manage-users-bundle
sd-content-bundleWARNING
The order of installation is important.
sd-content-bundlemust be installed last, as it relies on micro frontends (MFEs) from the other bundles to set up each page. To uninstall the Banking demo,sd-content-bundlemust be uninstalled first to resolve dependencies before other bundles can be be removed.- Click on the
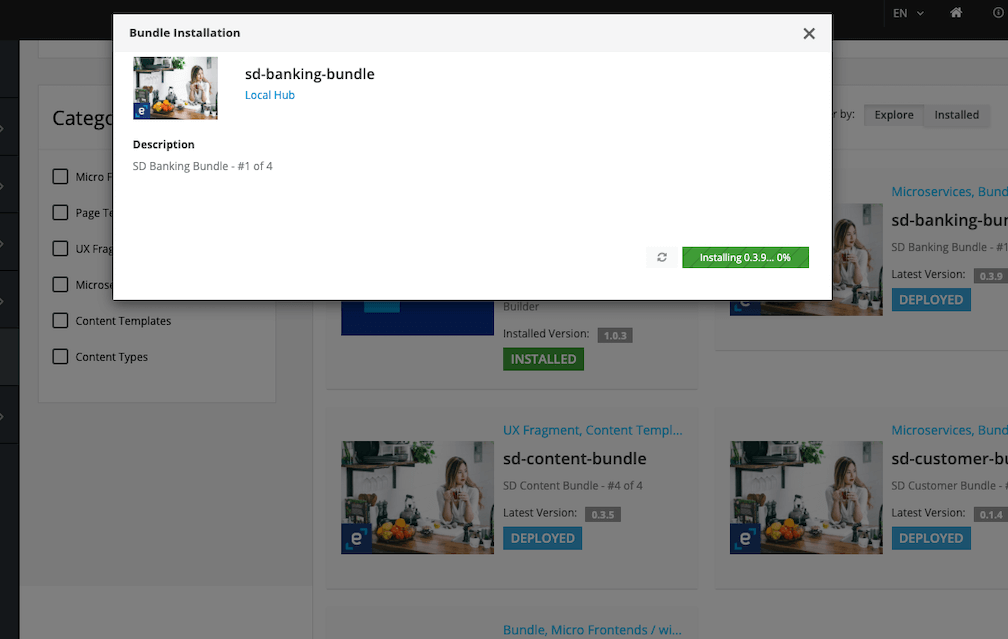
sd-banking-bundlethumbnail - In the pop-up window, click
DeployandInstall.
It may take several minutes to download the Linux images for the microservices, and install and initialize the assets. - Close the pop-up window
- Repeat for the remaining three bundles
- Click on the
The four bundles should now be listed in your Local Hub for use in any application.
# Manual Installation
Apply the definitions for the four bundles that comprise the Standard Banking Demo, in the order listed:
ent ecr deploy --repo="docker://registry.hub.docker.com/entandodemo/sd-banking-bundle"
ent ecr deploy --repo="docker://registry.hub.docker.com/entandodemo/sd-customer-bundle"
ent ecr deploy --repo="docker://registry.hub.docker.com/entandodemo/sd-manage-users-bundle"
ent ecr deploy --repo="docker://registry.hub.docker.com/entandodemo/sd-content-bundle"
Log in to your App Builder instance
Select
Hubin the left menu to view the bundles deployed to your Local HubInstalleach bundle:WARNING
The order of installation is important.
sd-content-bundlemust be installed last, as it relies on micro frontends (MFEs) from the other bundles to set up each page. To uninstall the Banking demo,sd-content-bundlemust be uninstalled first to resolve dependencies before other bundles can be be removed.- Click on the
sd-banking-bundleentry - In the pop-up window, click "Install"
It may take several minutes to download the Linux images for the microservices, and install and initialize the assets. - Close the pop-up window
- Repeat steps 1-3 for the remaining three bundles
TIP
Conflicts during the initial installation will generate an Installation Plan like the one shown below. After making your selections, click
Okin the lower right corner. You can also chooseUpdate AllorSkip Allas needed.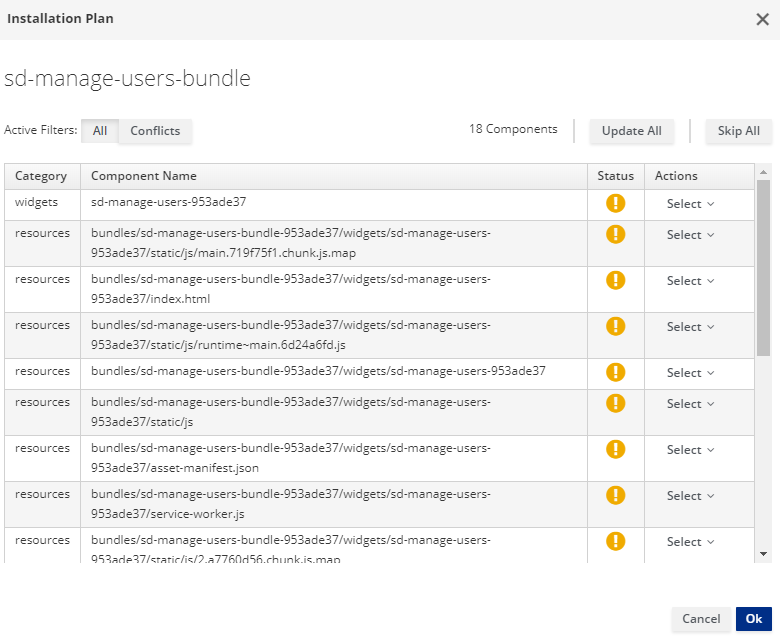
- Click on the
# Access the Standard Banking Demo
Access the Standard Banking Demo through one of the following options:
Option 1: Make the Standard Banking Demo your default homepage
- Go to
App Builder→Pages→Settings - In the drop-down menu for Home Page, select
Home/Home SD - Click
Save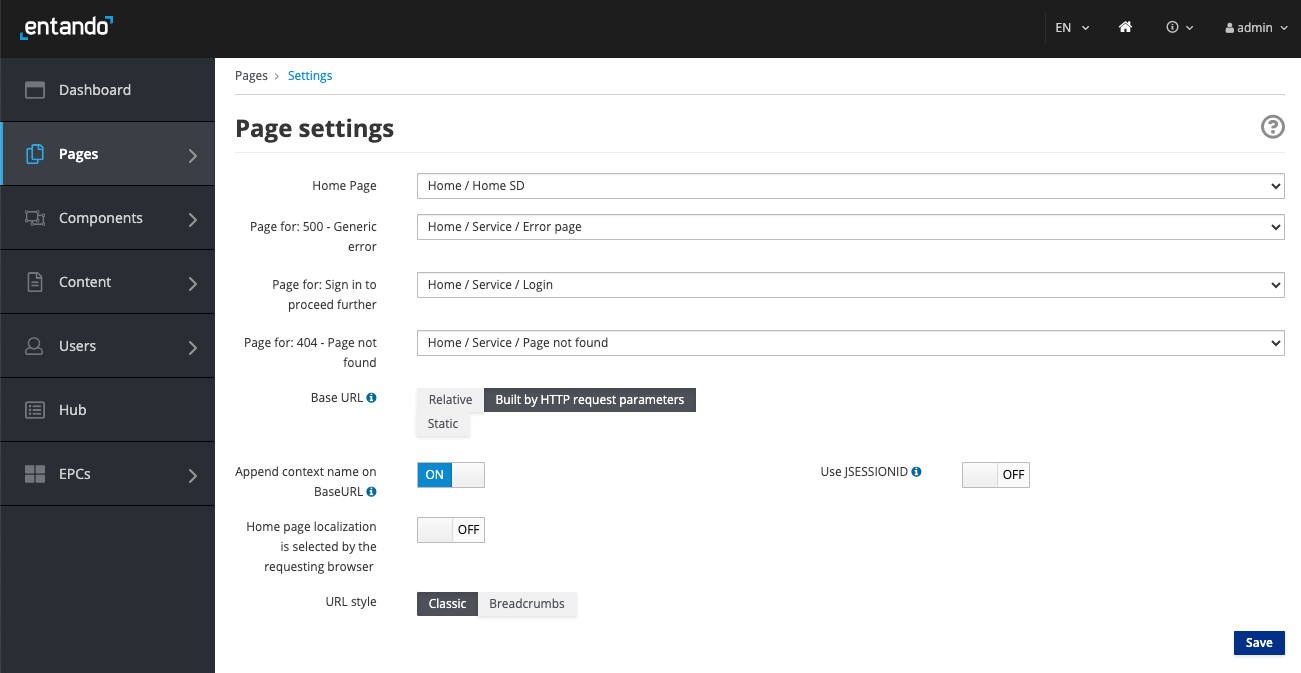
- Click the home icon in the upper right corner of the App Builder to see your new homepage
Option 2: Navigate to the Demo homepage from the App Builder page tree
- Go to
App Builder→Pages→Management - Find
Home SDin the page tree - From the
Actionsdrop-down menu, go toView Published Page
Congratulations!
You have just installed a reusable Villanova Bundle.

# Application Details
The Villanova Standard Banking application demonstrates a number of major features of the Villanova Platform:
- Modular and Composable components architecture
- Keycloak integration for role based access controls
- React and Angular micro frontends that coexist in the same application
- Micro frontend communication techniques
- Spring Boot Microservices
- Villanova Content Management
# Micro Frontends
The application includes six micro frontends (MFEs) showcasing complementary features and custom functionality. The key features of each are listed below.
# 1. Card MFE
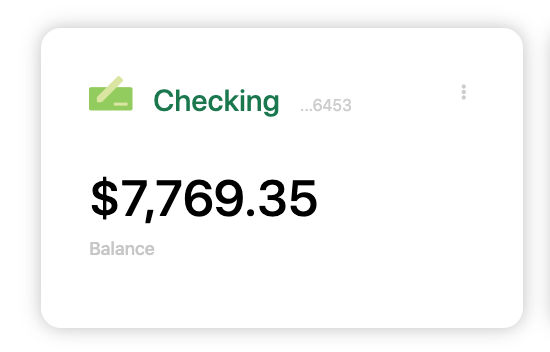
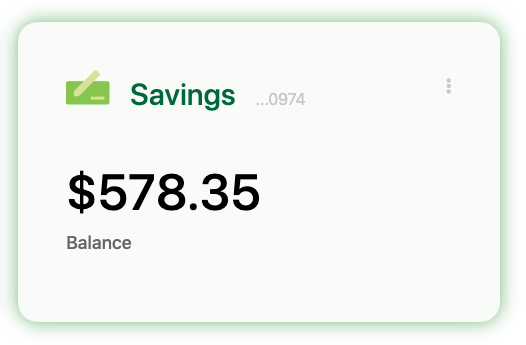
- This is a React MFE found on the My Dashboard page.
- It makes an API call to the banking microservice to fetch a numeric result dependent on the current card selection. The displayed value updates with changes to the card configuration.
- It is authorization-aware and passes the bearer token to the microservice. If an unauthenticated user renders the dashboard page, the widget displays an error message.
- This MFE emits events that are consumed by the Transaction Table widget.
# 2. Card NG MFE
- This is an Angular widget that is similar to the Card widget above, except for the choice of frontend technology.
- It communicates with the Transaction Table widget, which is built with React.
# 3. Manage Users MFE
- This MFE makes an API call to Keycloak to fetch user information.
- It is visible from the username drop-down menu when the user is logged in to the app.
- By default, application users are not granted Keycloak user management privileges.
- To use Keycloak to apply role based access controls for an MFE:
- Enable the Manage Users widget.
- Log in to Keycloak and assign the realm-management
view-usersandmanage-usersclient roles to the desired user.
- See the Villanova Identity Management System page for details.
- To use Keycloak to apply role based access controls for an MFE:
Authorized View

Unauthorized View

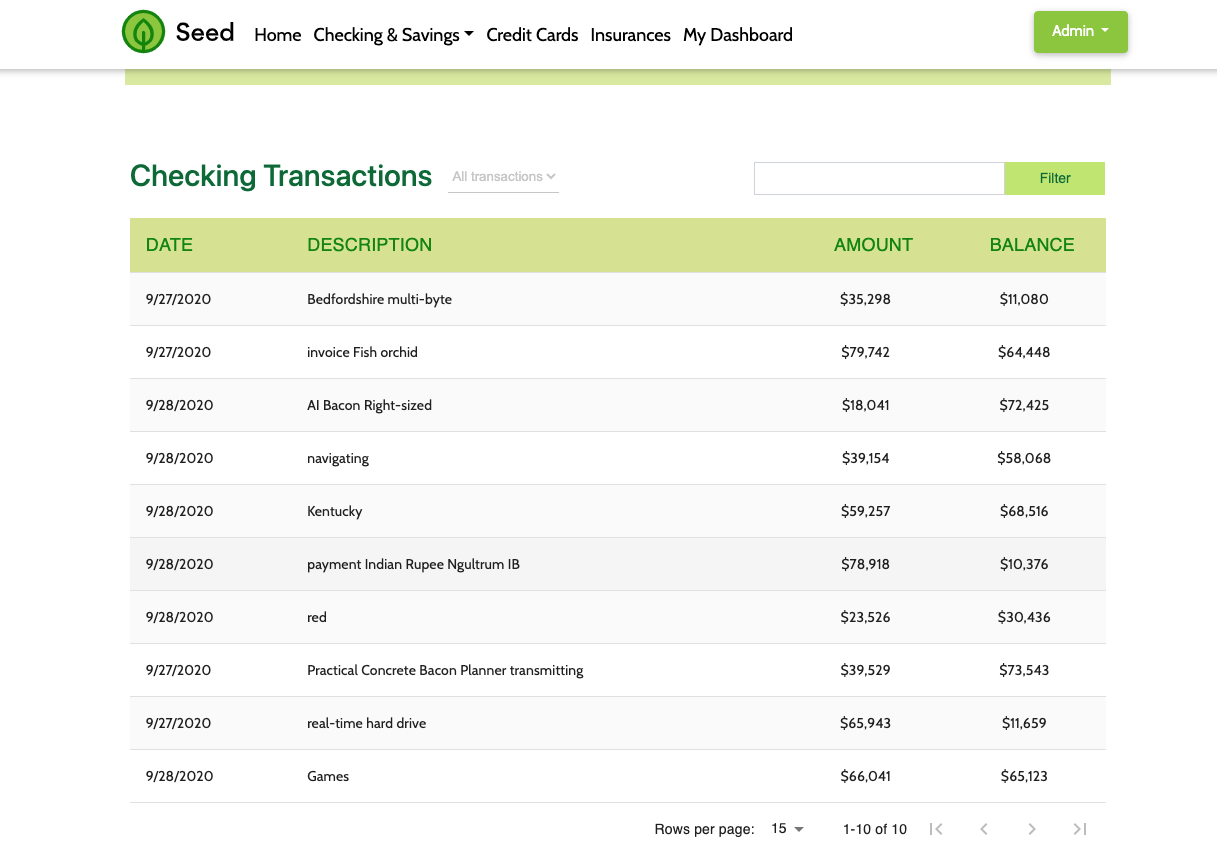
# 4. Transaction Table MFE
- This is a React micro frontend that consumes events from the Card MFEs.
- It makes an API call to the banking microservice to fetch transaction data.
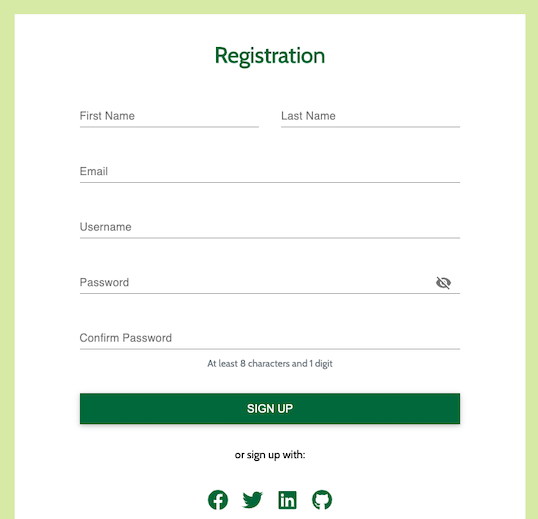
# 5. Sign Up MFE
- This is a form widget located on the sign up page.
- It makes an API call to the customer microservice to create a new user.
- Unauthenticated users can access this widget from any page.
# 6. Alert Icon MFE
- This MFE displays an icon on the dashboard page.
- It includes a configuration MFE for the user to select the icon's appearance and datatype.
- By default, it makes an API call to the banking microservice to fetch data.
![]()
# Configuration Micro Frontends
Many of the Standard Banking Demo MFEs include configuration screens. These are visible in the App Builder at Components → Micro frontends & Widgets. To view a rendered configuration screen, place the MFE on a new page.
# Microservices
Two microservices generate the data displayed by the Standard Banking Demo MFEs. Both are managed by the Villanova Operator to automate their deployment and link them to the Application.
The microservices demonstrate how the Villanova Operator, Liquibase, and Spring Boot can be used to automatically provision data. The sample data is available in the microservice source code (opens new window).
# Static Widgets
The Standard Banking Demo uses static HTML, FreeMarker, and JavaScript widgets to display content, e.g. headers, footers, and images. To view the static widgets, log in to the App Builder and select Components → Micro frontends & Widgets.
# Static CMS Content
The Standard Banking Demo relies on the Villanova CMS to create content templates, content types, content, etc. To learn more about the Villanova CMS, log in to the App Builder and go to Content and select Templates, Management, and Types.
# Source Code
The source code for the Villanova Standard Banking Demo can be found on GitHub here (opens new window) along with our other open source examples and tutorials.